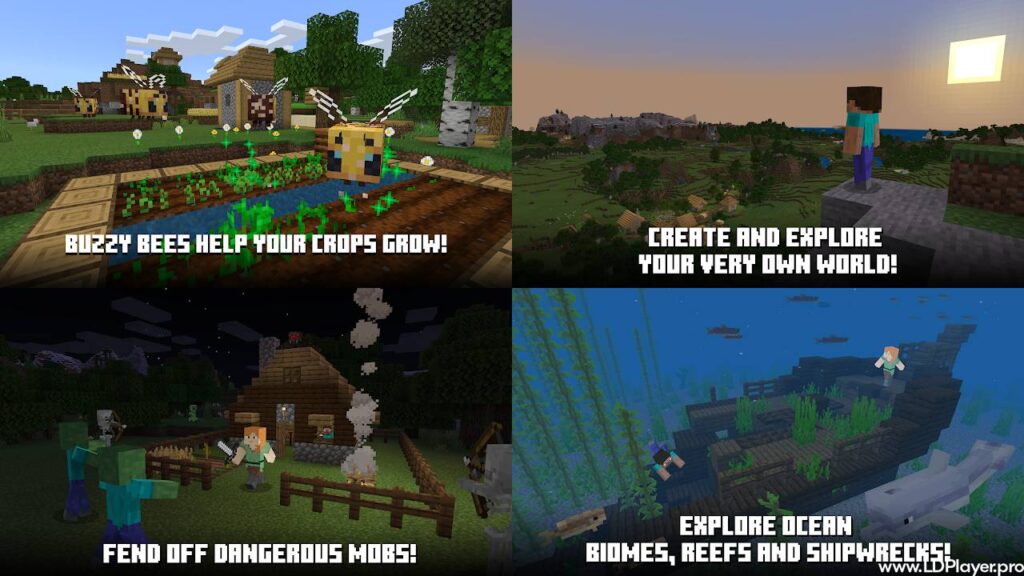
Minecraft Trial gives new players a safe and free way to explore Minecraft before buying the full game. It includes the main survival features, such as mining, crafting, building, food collection, and mob attacks. Therefore, players can learn how the game works without making a payment first.
The trial also helps users test the game on their device. They can check the controls, graphics, sound, and overall performance. As a result, they can decide whether the full version suits their needs.

What is Minecraft Trial?
Minecraft Trial is a time-limited version of Minecraft Bedrock Edition. It gives players access to single-player Survival mode on supported devices. These devices may include Android phones, Windows computers, and some game consoles.
The trial does not use a small fixed map. Instead, it creates a full world with random land, caves, trees, animals, and natural resources. Therefore, each new world can feel different.
Players can explore forests, deserts, mountains, rivers, villages, and underground areas. They can also collect blocks and use them to build useful structures.
The main limit is the playing time. Players usually receive up to 90 minutes of active gameplay. This period equals about four and a half in-game days and nights.
During this time, players must work quickly. They need to gather wood, find food, build shelter, and prepare for night. Once the timer ends, the world may remain visible. However, normal building and interaction may become locked.
Players who want to continue can buy the full game. In many cases, they can then return to the same world and continue playing.
| Trial Version Item | Available Details |
|---|---|
| Game Mode | Single-Player Survival |
| Play Time Limit | Up to 90 Minutes |
| World Type | Random Bedrock World |
| Multiplayer | Not Available |
| Realms | Not Available |
| Creative Mode | Not Available |
| Cheats | Not Available |
Minecraft Trial Features
The free version includes the main systems that make survival gameplay interesting. Although the timer limits the session, the core experience remains close to the full game.
Core Survival Mode
Players enter the world without tools, food, weapons, or building materials. Therefore, the first task is usually to find a tree and collect wood.
Health and hunger bars appear on the screen. The health bar shows how much damage a player can take. Meanwhile, the hunger bar shows when food is needed.
Several dangers can reduce health. These include falling, drowning, fire, lava, hostile mobs, and long periods without food. As a result, careful movement becomes important.
Food can come from animals, crops, fish, berries, apples, or other sources. Cooked food usually restores more hunger than raw food. Therefore, building a furnace can help during the early game.
Authentic World Generation
Each world uses random world generation. This system creates different land shapes, weather areas, caves, water sources, and natural structures.
A player may begin near a forest, open field, beach, desert, or mountain. Sometimes, useful places such as villages may appear close to the starting point.
Minecraft Trial also includes different biomes. Each biome has its own land, plants, blocks, animals, and weather conditions. Therefore, the local area affects the first survival plan.
Forests provide plenty of wood. Plains offer open land and animals. Mountains may contain visible stone and coal. Deserts have fewer trees, so survival can become harder.
Full Crafting and Tech Tree
Crafting plays a major role in the trial experience. Players can collect raw materials and turn them into tools, blocks, food, and useful items.
Wood is usually the first resource. It can become wooden planks, sticks, tools, doors, chests, and crafting tables.
After making a wooden pickaxe, players can mine stone. Stone tools work faster and last longer than wooden tools. Therefore, upgrading early saves time.
Iron ore may appear underground or inside caves. A furnace can turn iron ore into iron ingots. These ingots can create stronger tools, armor, buckets, and other items.
The available time may not support every advanced goal. Still, the trial lets players follow the main crafting path from wood to stone and iron.
Dynamic Hostile Mobs
Dangerous mobs appear in dark places and during the night. Common threats include Zombies, Skeletons, Spiders, and Creepers.
Zombies move toward players and attack at close range. Skeletons use bows and can attack from a distance. Spiders move quickly and can climb some walls.
Creepers are especially dangerous. They move close to players and explode after a short warning sound. Therefore, players should avoid fighting Creepers near buildings or stored items.
Light helps control mob spawning. Torches can make homes, caves, and work areas safer. A closed shelter also protects players during the first night.
How To Install Minecraft Trial on LDPlayer
LDPlayer allows Android apps to run on a Windows computer. It can provide a larger screen and keyboard controls. However, computer performance may affect the gameplay experience.
Follow these steps to install and run the app.
1. Download and Install LDPlayer
Open the official LDPlayer website through a trusted browser. Then, download the current Windows installer.
After the download finishes, open the setup file. Follow the instructions shown on the screen.
The installer may ask for permission to make changes to the computer. Review the request before continuing.
For better performance, enable Virtualization Technology in the computer BIOS. This feature may appear as VT, Intel VT-x, AMD-V, or SVM.
2. Configure Emulator Settings
Launch LDPlayer after installation. Then, open the Settings menu from the side toolbar.
Choose suitable CPU and memory settings for the computer. A system with enough resources may use four CPU cores and 4GB of RAM.
However, users should not assign all system memory to the emulator. Windows and other programs also need memory.
Next, select a suitable screen resolution. A lower resolution may improve performance on older computers. Meanwhile, a higher resolution may provide a clearer image.
Save the settings and restart LDPlayer when required.
3. Access the Google Play Store
Open the System Apps folder on the LDPlayer home screen. Then, select the Google Play Store.
Sign in with a valid Google Account. Use the normal Google sign-in page inside the Play Store.
Never enter account details into unknown pop-up windows or third-party login pages. Trusted login screens help protect account information.
After signing in, wait for the store page to load completely.
4. Locate and Download the Application
Use the Play Store search bar and enter Minecraft Trial. Check the app name, publisher details, and store information before installing it.
Select the official app page. Then, click the Install button.
The download size may vary by device and version. Therefore, use a stable internet connection.
Once the installation finishes, the app icon should appear on the LDPlayer home screen.
5. Configure Keyboard and Mouse Controls
Open Minecraft Trial from the emulator home screen. Wait until the main menu appears.
Next, click the keyboard mapping icon on the LDPlayer toolbar. Set movement controls to suitable keys, such as W, A, S, and D.
Add keys for jumping, opening inventory, attacking, placing blocks, and using items. Mouse controls can also support looking around and selecting objects.
Test every control before starting a serious game. Poor key placement can waste valuable trial time.
Save the control layout after making changes.
How To Play Minecraft Trial
The limited timer makes early planning important. Players should gather essential items before spending time on long trips.
The following step-by-step method helps new users survive and explore more safely.
Phase 1: First 3 Minutes
Start by looking for nearby trees. Move to the closest tree and collect about 10 to 15 wood logs.
Open the crafting menu and turn some logs into wooden planks. Then, create a crafting table.
Place the crafting table on safe ground. Use it to make sticks and a wooden pickaxe.
A wooden axe can also save time while collecting more wood. However, the pickaxe should come first because it allows stone mining.
Keep several logs for charcoal, tools, and building blocks.
Phase 2: Next 5 Minutes
Find exposed stone near a hill, riverbank, or cave entrance. Mine enough stone for a stone pickaxe, stone axe, stone sword, and furnace.
Stone tools improve speed and strength. Therefore, replace wooden tools as soon as possible.
Next, search for food. Animals may provide raw meat, while trees may drop apples. Some areas also contain berries or crops.
Cook raw meat in a furnace when fuel is available. Wood, planks, coal, and charcoal can work as fuel.
Keep watching the sun. Daylight passes quickly, so avoid moving too far from the starting area.
Phase 3: Before Sunset
Choose a safe place for the first shelter. A small hill, flat field, or shallow cave can work well.
Build walls, a roof, and a door. Make sure the shelter has no open gaps.
A simple room does not need to look attractive. It only needs to block mobs and provide a safe work area.
Create torches from coal and sticks. When coal is unavailable, make charcoal by burning logs inside a furnace.
Place torches inside and around the shelter. Light reduces the chance of hostile mobs appearing nearby.
Store extra items inside a chest when possible. This step protects useful materials if the player dies.
Phase 4: Nighttime
Night is a good time for careful mining. However, avoid entering deep caves without food, torches, and a weapon.
Create a staircase mine from inside the shelter. Dig one block forward and one block down at each step.
Never dig straight down. A hidden cave, lava pool, or deep fall may appear below.
Collect coal, stone, and iron ore along the path. Place torches often, so mobs do not appear behind the player.
Listen for mob sounds. These sounds may warn about nearby caves or unsafe spaces.
Return to the shelter before health, food, or tools become too low.
| Phase | Time | Main Goal | Recommended Action |
|---|---|---|---|
| Phase 1 | First 3 Minutes | Collect Wood | Gather logs and craft basic tools |
| Phase 2 | Next 5 Minutes | Upgrade Tools | Mine stone and collect food |
| Phase 3 | Before Sunset | Build Shelter | Create walls, roof, door, and torches |
| Phase 4 | Nighttime | Mine Safely | Use a staircase and collect useful ore |
This order gives players a strong start. It also leaves more time for exploration after basic safety needs are complete.
Safety and Legality
Official downloads reduce the risk of harmful files, stolen accounts, and damaged game data. Therefore, players should use trusted stores and approved websites.
Use Official Sources Only
Download Minecraft Trial through official or approved platforms. These may include the Google Play Store, Microsoft Store, supported console stores, or an approved emulator store.
Check the publisher name before installing any app. Fake apps may copy the title, icon, or screenshots.
Avoid Unverified APK Files
Unknown websites may offer changed APK files, unlocked versions, or cracked packages. These files may include harmful code.
Malware can steal passwords, track activity, show unwanted ads, or damage stored files. Therefore, avoid unofficial downloads even when they promise extra features.
Modified files may also break the game license. They can cause crashes, update errors, or account problems.
Protect Account Information
Use standard Microsoft or Google login windows. Do not enter passwords into unknown websites, forms, or pop-up boxes.
Strong passwords should not be shared with other people. Two-step verification can also improve account safety.
Players should also avoid websites that promise free full-game accounts. Such offers often try to steal login details.
Minecraft Trial FAQ
How long does the Minecraft trial last?
The free demo usually provides up to 90 minutes of active gameplay. This equals about four and a half in-game days.
The timer may only count active play, depending on the platform. However, players should still prepare before entering the world.
Can worlds created in the trial version be transferred to the full game?
In many cases, buying the full version allows players to continue using the existing trial world.
However, transfer options may depend on the platform, account, device, and game version. Keeping the same account can make the process easier.
Is multiplayer mode accessible during the trial?
Online multiplayer, cross-platform servers, and Realms are usually unavailable in the trial version.
The demo mainly focuses on single-player Survival mode. Therefore, players who want online play need the full release.
Are Creative Mode and cheats available?
Creative Mode and cheats are locked in the trial. Players must gather resources and survive through normal gameplay.
This rule gives new users a clear view of the standard Survival experience.
Can the timer be restarted?
Creating another world may not always reset the full trial allowance. The timer rules can depend on the platform and app version.
Buying the full game removes the trial limit and unlocks the complete experience.
Does the trial need an internet connection?
An internet connection is needed for downloading the app and signing into some stores.
Some gameplay may work offline after installation. However, account checks or license checks may still require internet access.
Final Words
Minecraft Trial offers a simple way to test the main Minecraft survival system before buying the full game. Players can gather materials, make tools, build shelter, search caves, and face hostile mobs.
The time limit encourages fast planning and careful choices. Therefore, new players should focus on wood, stone, food, light, and shelter first.
Mobile users can play directly on supported Android devices. Windows users may also run the mobile app through LDPlayer when their computer meets the needed requirements.
Most importantly, users should download the game from trusted sources. Official files protect devices, accounts, and saved worlds.
Minecraft Trial gives players enough time to learn the basics and understand the main gameplay loop. It is a useful starting point for anyone who wants to enter the block-based survival world safely.